General Content Page
Table of Contents:
- How to Navigate to the Pages Interface
- How to Create a General Content Page
- How to Update a General Content Page
- How to Preview a Page
- How to Update SEO Metadata
- How to Update Social Share Data for a URL
- How to Delete a General Content Page
- How to Archive a General Content Page
- How to Unarchive a General Content Page
How to Navigate to the Pages Interface
The majority of content updates and creation of new content will be made in the Pages interface within Kentico. Once you get to the Pages section, all of the pages on the site are organized in a "content tree" structure.
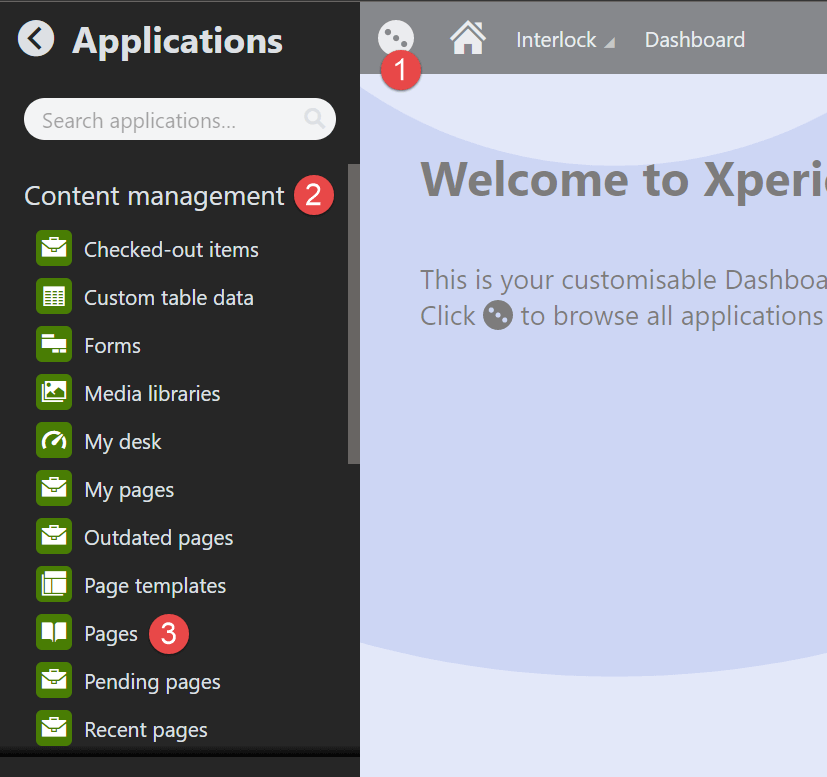
- Click on Applications icon
- Click on Content Management
- Click on Pages
How to Create a General Content Page

- Navigate to the Pages interface
- Find the position on the tree and select the parent
- Click on the + icon
- Find and click on General Content Page
- Fill out at lease the required fields
- Click on the Save button
- Click on Preview and then on Open in a new tab (Optional)
- Click on the Publish button
Note: Once you have saved the page, the page and content tab will appear. To enter the content on the page, you must go to the page tab. It is where you will create the layout of your page and add content (widgets) to it using page builder. Click on the page builder link here to learn more.
How to Update a General Content Page

- Navigate to the Pages interface
- Click on the Edit button or make sure it is selected
- Find and select the general content page of your preference from the tree
- Click on the Content tab to edit the page name, headline, description, social share data, or preview text.
- Click on the Page tab to edit other content within the page builder.
- Scroll down and make the updates
- Click on the Save button
- Click on Preview and then on Open in a new tab (Optional)
- Click on the Publish button
How to Preview a Page
Previewing a page allows you to see your changes before they are published to the live site.
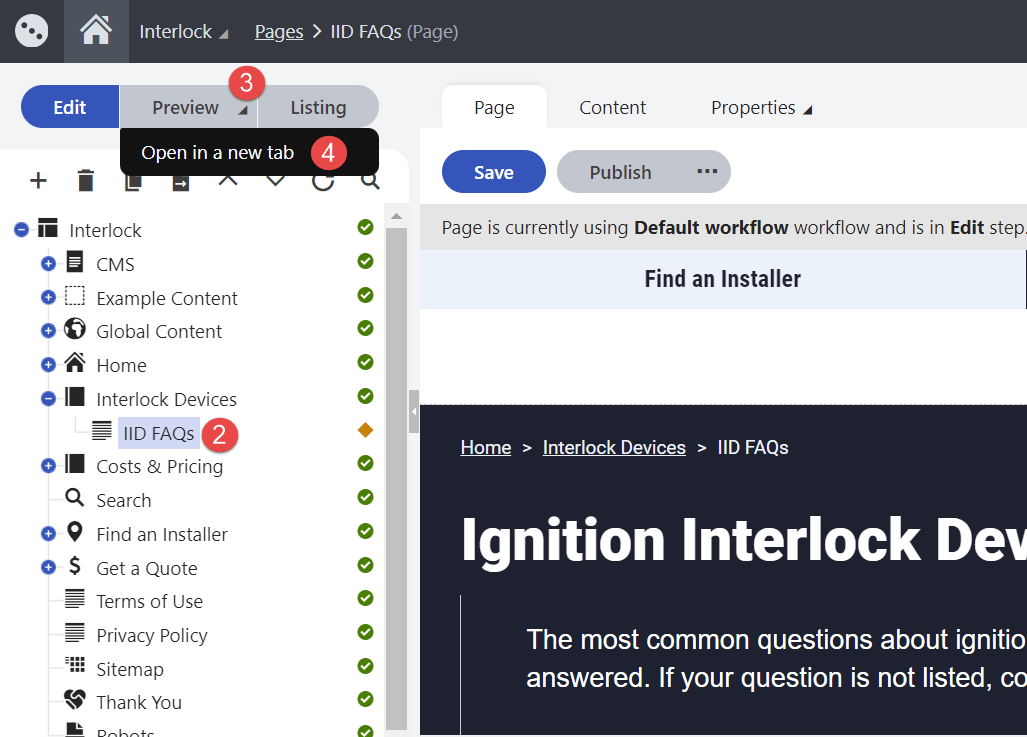
- Navigate to the Pages interface
- Find and select the page of your preference
- Click on the Preview button
- Select Open in a new tab
How to Update SEO Metadata
Adding metadata to your pages is good for SEO.

- Navigate to the Pages interface
- Find and select the page of your preference
- Click on the Properties tab
- Click on the Metadata
- Update the page title or description copy
- Click on the Save button
- Click on Preview and then on Open in a new tab (Optional)
- Click on the Publish button

- Navigate to the Pages interface
- Click on the Edit button or make sure it is selected
- Find and select the page of your preference from the tree
- Click on the Content tab or make sure it is selected
- Scroll down and find Social Share Fields (Overrides) section
- Update the Title, description, URL or image
- Click on the Save button
- Click on Preview and then on Open in a new tab (Optional)
- Click on the Publish button
How to Delete a General Content Page
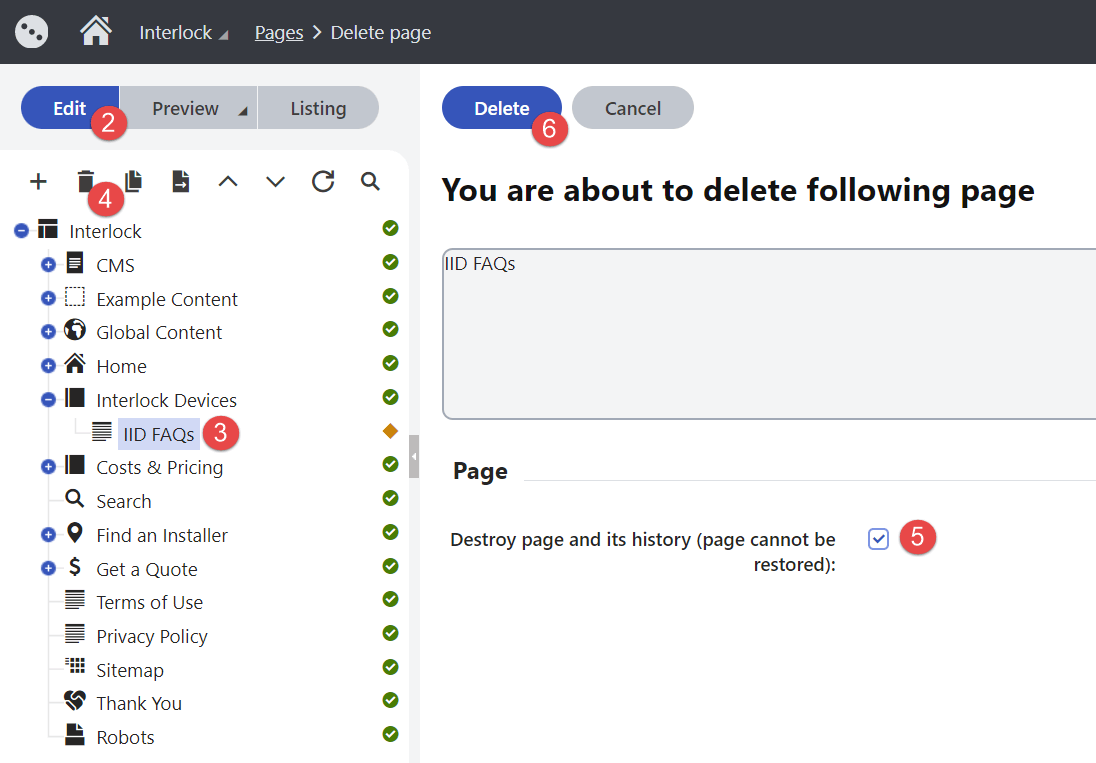
- Navigate to the Pages interface
- Click on Edit button or make sure it is selected
- Find and select the page type in the tree
- Click on the Delete button
- Select Destroy page and its history check box (Optional)
- Click on the Delete button
Note: Once you delete the page, as best practice, a redirect should be created. (Click on the link to learn more about Redirects)
How to Archive a Page
When a page reaches the Archived step, it completes its workflow cycle.
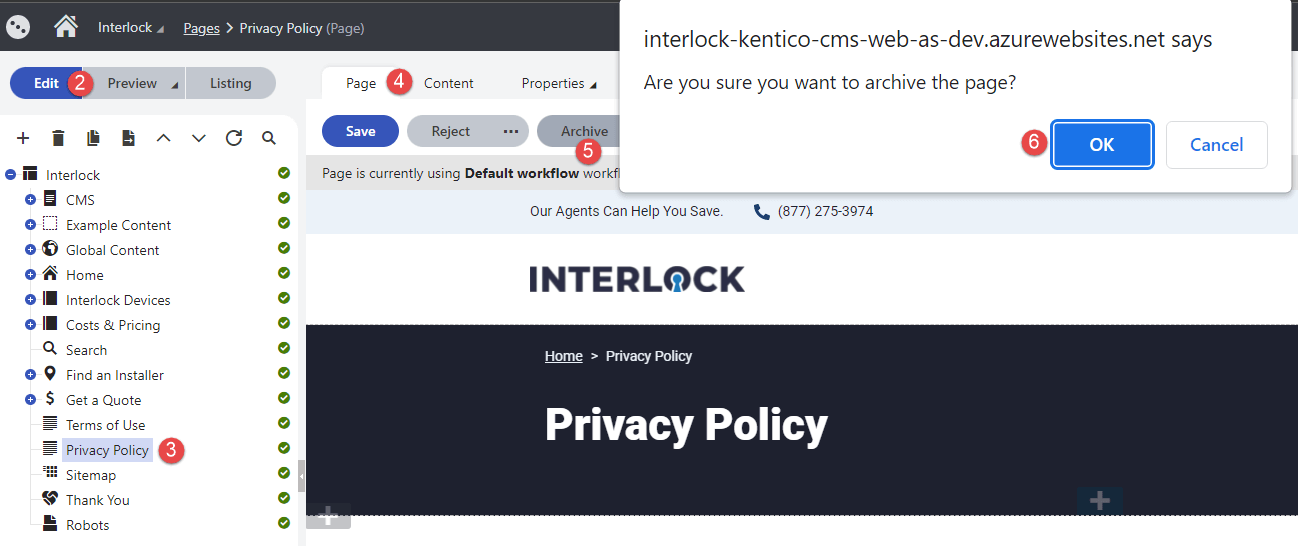
- Navigate to the Pages interface
- Click on the Edit button or make sure it is selected
- Find and select the page type in the tree
- Click on the either Content or Page tabs or make sure one of them selected
- Click on the Archive button
- Click OK in confirmation message
Note:
- Once the page type is archived, the green icon turns gray in the content tree.
- If the archived page type is a page, as best practice, a redirect for the deleted page should be created once the page is archived. (Click on the link here to learn more about Redirects)
How to Unarchive a Page
When a page type reaches the Archived step, it completes its workflow cycle. Unarchiving the page type will start a new cycle and put it back to the edit step.

- Navigate to the Pages interface
- Click on the Edit button or make sure it is selected
- Find and select the page type in the tree
- Click on the Content tab or make sure it is selected
- Click on the Save button
- Click on Preview and then on Open in a new tab (Optional)
- Click on the Publish button
Note: Once the page type is unarchived, and starts a new cycle the gray icon turns green in the content tree.